
How to Make a Decision Tree in Powerpoint? Quick and Easy Instructions
We’ll today discover how to create a decision tree in Microsoft PowerPoint for an effective decision-making? This will be an quick and easy way to make decision tree PowerPoint presentations.
But if you do not have time to deal with shapes and customizations, then we also provide you with an ready-to-use Excel template to use in your presentations.
Table Of Content
1. Decision Tree PowerPoint Presentations
2. How to Make a Decision Tree in Powerpoint?
3. How to export Decision Tree Excel Template to Powerpoint?
4. Wrap up
5. FAQ’s
1. Decision Tree PowerPoint Presentations
Decision trees are an important part of decision analysis because they show how different decisions are made visually. Microsoft PowerPoint is clearly one of the best ways to show these trees.
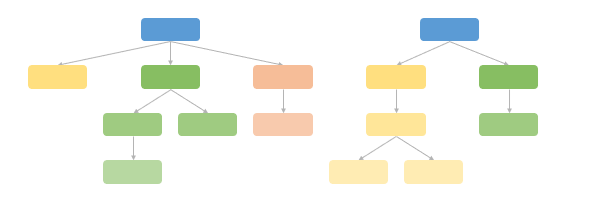
A PowerPoint decision tree can break down hard choices into manageable chunks by showing different paths and results in a way that is clear and easy to understand. Because of this, decision trees work best for situations where accuracy and clarity are very important, like business talks, project planning, or teaching.
Remember that a decision tree works best when it is clear and can make hard choices easier to understand. So, take the time to make sure that your tree is not only useful, but also nice to look at and simple to understand.

You can get good at making powerful decision trees that improve your talks and help people make better choices if you practice.
2. How to Make a Decision Tree in Powerpoint?
To make a decision tree in PowerPoint, follow these simple steps:
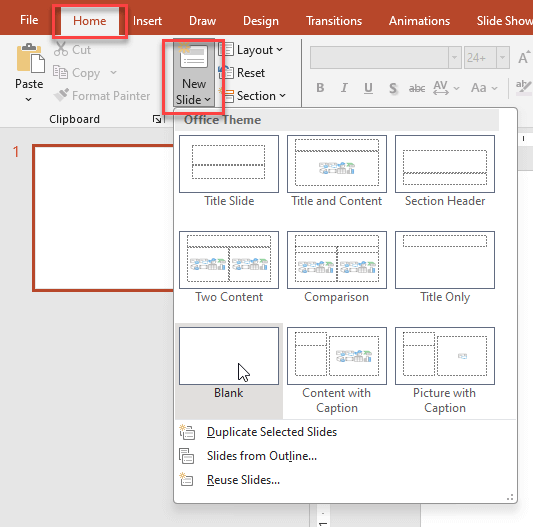
#Step1: Open PowerPoint and Insert New Slide
Bring up PowerPoint and start a new show. Put your choice tree on a blank slide.
#Step2: Insert SmartArt Graphics
Select SmartArt from the Illustrations group on the Insert tab. This brings up a list of graphics that can be used for decision trees.
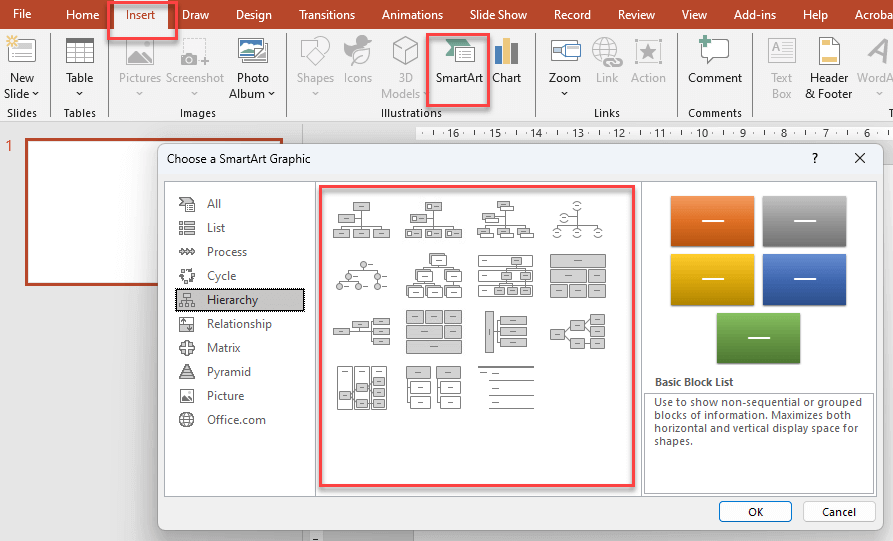
#Step3: Select your diagram
Click on the layout that works best for your decision tree in the SmartArt Graphic dialog box. The Hierarchy group usually has layouts that work well.
#Step4: Add your texts
Click on each shape to add your texts:
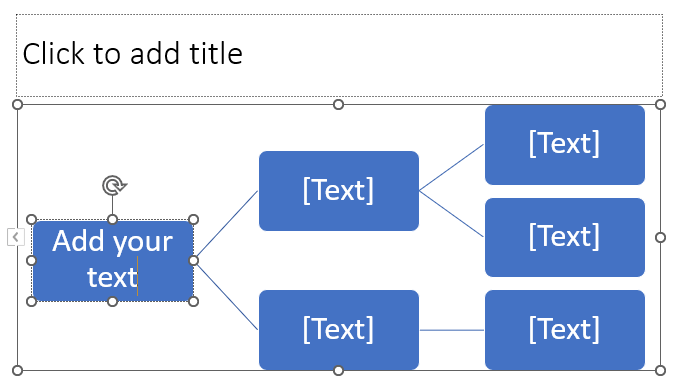
#Step5: Customize your decision tree
You can add text to the SmartArt picture you’ve picked. You can make the tree correctly show your decision-making process by adding or removing shapes, changing colors, and adjusting the layout.

Here are some customizations you can do:
- Change the colors of the boxes
- Add a Title
- Add lables like Yes, No or Maybe. You can also add probability percentages here.
- Change the fonts

This step-by-step guide makes it easier to make a decision tree, which will add more interest and useful information to your PowerPoint show.
3. How to export Decision Tree Excel Template to Powerpoint?
If you do not want to spend your time with these steps, we provide you a ready-to-use Decision Tree Generator in Excel.
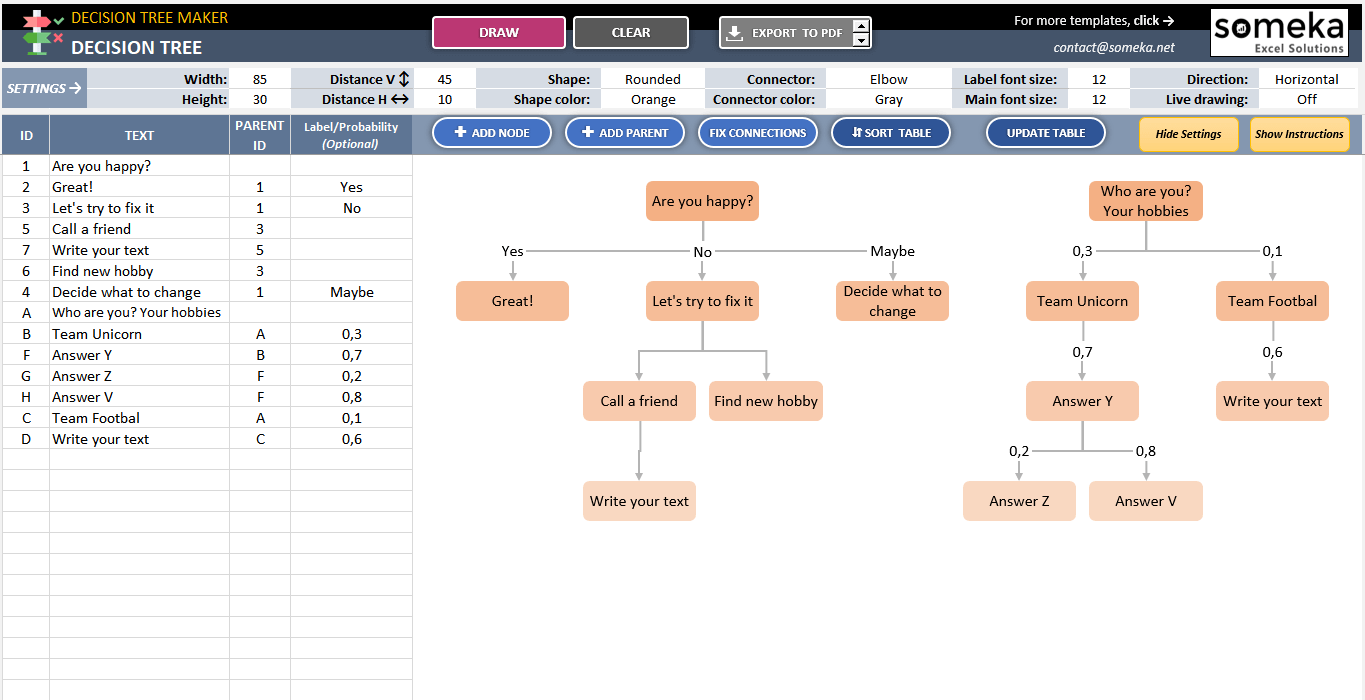
– Main page of the Decision Tree Generator Excel Template by Someka –
Here’s a quick solution:
- Download this template
- List your decision texts to the table on the right side
- Click Draw button
- Customize your decision diagram with Setting configurations
- Export your decision tree from Excel to Powerpoint

There is no trouble moving a decision tree from an Excel file to PowerPoint:
Then you have three options:
#Option1: Copy your whole diagram and paste to your presentation
#Option2: Save your excel sheet as pdf
#Option3 [Recommended] : Use Export to PNG button and insert that image directly to your presentation
This method lets you show complicated Excel data for making decisions in a more interesting PowerPoint style.
4. Wrap up
To sum up, learning how to make a decision tree in PowerPoint or from an Excel template is helpful for anyone who wants to explain complicated decision-making processes in a way that is clear and interesting.
A well-made decision tree can help people understand the different options and results of a choice, whether they are in a business meeting, an academic presentation, or a personal project.

PowerPoint is a great tool for this job because it is easy to use and has SmartArt Graphics. Decision trees can be made straight in PowerPoint, or they can be imported from Excel without any problems. This is very important if you want to make sure that your show fits the needs and goals of your audience.
Hope you’ve enjoyed your decision tree journey!
5. FAQ’s
We have also picked up some of the most asked questions for ppt decision trees.
What are the elements of a decision tree diagram?
The elements of a decision tree include:
- Nodes: These represent decisions, outcomes, or other key action points. You can use Decision Nodes or Chance Nodes.
- Branches: They symbolize the choices leading to different paths. You can add Yes/No or Maybe labels to the branches.
- Leaves: The end points or final outcomes of each decision path.
How to make a tree diagram in ppt?
Here are the simple steps to create tree diagram in ppt:
- Go to the “Insert” tab on a new slide.
- Look in the Illustrations group and click on “SmartArt.”
- Pick a structure from the “Relationship” or “Hierarchy” group that looks like a tree layout.
- Click on the text boxes to fill in your information. You can change your diagram by adding or removing lines.
- Change the colors, styles, and forms of your tree diagram to make it look the way you want it to.
What is decision tree in machine learning in ppt?
There is a model in machine learning called a decision tree that is used for both classification and regression. When you use PowerPoint to show a decision tree in machine learning, it shows how the model divides data into groups based on different factors so that it can make a prediction or decision.
Each internal node is a test on an attribute, each branch is a result of the test, and each leaf node is a class label or decision. The structure looks like a flowchart.
Recommended Readings:
How to Make a Decision Tree in Excel?
Related Posts