How to Autofit in Excel? 3 Instant Methods
Do you want to adjust the width of columns and the height of rows to fit your content? So, here’s simple but pro guide on How to Autofit in Excel with pro tips and examples.
Table Of Content
1. What’s Excel AutoFit?
2. How to AutoFit in Excel?
3. What’s the Shortcut for AutoFit in Excel?
4. AutoFit Not Working? Why? How to Solve?
5. Alternatives to AutoFit
6. Key Takeaways
Follow easy steps with images and instructions. Trouble shooting and Alternatives also included.

1. What’s Excel AutoFit?
Excel AutoFit is a feature to adjust the width of columns and/or the height of rows to fit the content within cells. So, it basically ensures that all data within a cell is visible without having to manually resize each column or row.
Additionally, there are two aspects on adjusting your content to the Excel cells:
- AutoFit Column Width: AutoFit Column Width adjusts the width of a column to match the length of the longest string of text in that column. This prevents text from being hidden and makes the data presentation more readable.
- AutoFit Row Height: AutoFit Row Height adjusts the height of a row to fit the tallest piece of data in that row. This is particularly useful when dealing with cells that contain multiple lines of text or larger font sizes.
Let’s see how to adapt this incredibly useful feature for maintaining a clean spreadsheet.

2. How to AutoFit in Excel?
There are several methods to use the AutoFit feature in Excel. Let’s explore these methods in detail:
Method 1: Double Click
One of the simplest ways to AutoFit columns or rows is by using the double-click method. After selecting your cell or cells, you can double click on the edges.

How to AutoFit Column Width?
- Firstly, move your cursor to the right edge of the column header.
- The cursor will change to a double-headed arrow.
- Then, Double-click the edge.
- So, the column width will adjust automatically to fit the longest piece of data in that column.
How to AutoFit Row Height?
- Firstly, move your cursor to the bottom edge of the row header.
- The cursor will change to a double-headed arrow.
- Afterwards, double-click the edge.
- The row height will adjust automatically to fit the tallest piece of data in that row.
Method 2: AutoFit Buttons on the Ribbon
Secondly, Excel also provides AutoFit buttons on the Ribbon. So, you can easily access to this buttons.
- Step 1: Go to Home > Cells > Format
- Step 2: Select one of the Autofit options according to your need
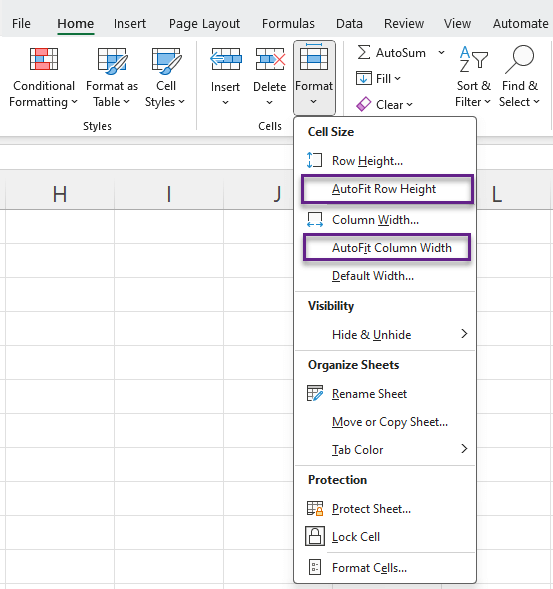
So, this is a very easy way to autofit your columns and rows.
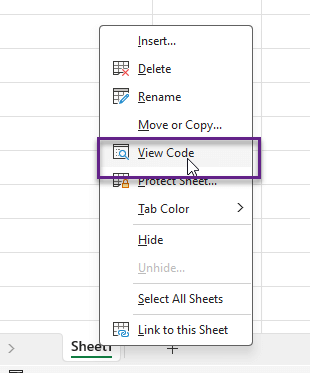
Method 3: View Code
For those who prefer a more technical approach, using VBA (Visual Basic for Applications) to AutoFit columns and rows can be very efficient, especially for larger datasets.
Do not woryy! You do not have to be coder or macro expert. Just copy this simple code, and automatize all your sheet for autofit.
- Right click on the sheet you want to add autofit
- Select View Code
- On the developer window, select Worksheet from the Dropdown menu
- Enter the below code:
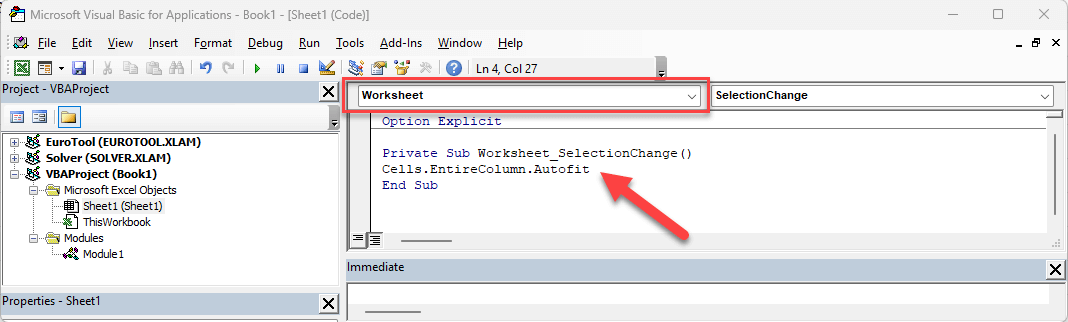
So it’s so easy!
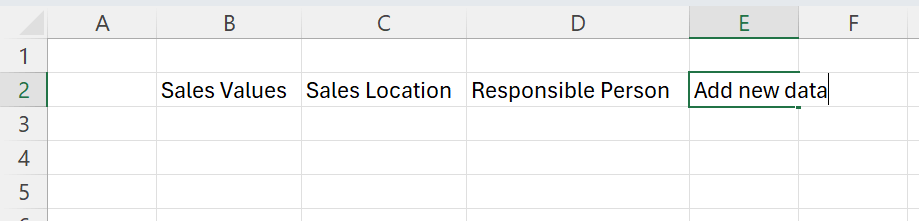
And now once you’ve added this macro, whenever you add some content to your sheet, it will automatically fit the columns to your content.
Finally, this is the end of the three simple methods.
3. What’s the Shortcut for AutoFit in Excel?
If you’re a keyboard fan, then you might be wondering the shortcut keys for autofit.
So, you can easily use ALT combinations to navigate through Excel ribbon.
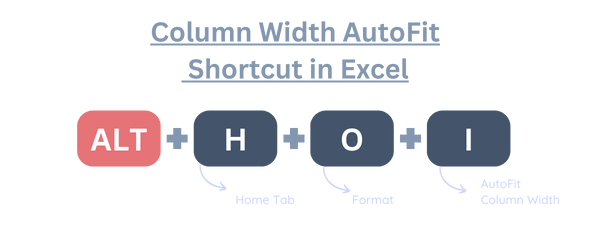
Firstly, the shortcut for AutoFit Column Width is ALT + H + O + I.
And, the shortcut for AutoFit Row Height is ALT + H + O + A.

Shortcuts can significantly speed up your workflow. In addition, you do not have to memorize these shortcuts as Excel will help you with references after you press on the ALT button.
4. AutoFit Not Working in Excel? Why? How to Solve?
If you’re having issues with AutoFit function, you might have be facing one of the below reasons:
-
Merged Cells:
AutoFit does not work on columns or rows that contain merged cells. To resolve this, unmerge the cells before applying AutoFit.
-
Hidden Columns/Rows:
If there are hidden columns or rows within the selected range, AutoFit might not adjust properly. Ensure all columns and rows are visible before applying AutoFit.
-
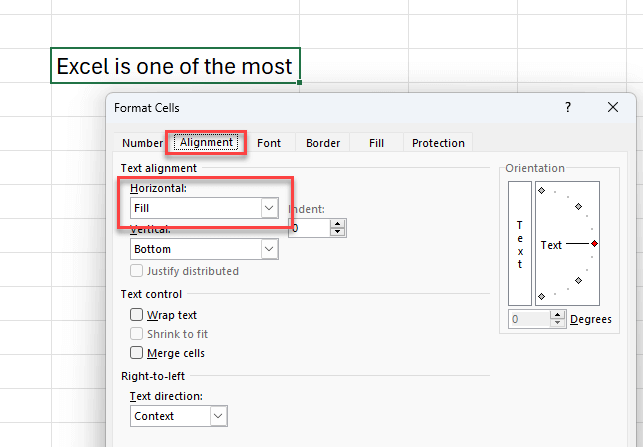
Text Alignment:
Sometimes, text alignment settings (e.g. wrapped text or vertical alignment) can affect AutoFit. So, you can adjust the alignment settings and try AutoFit again. Open Format Cell Window with CTRL+1 and go to Alignment tab to change your setting.
-
Manual Overrides:
If manual width or height settings have been applied, they might override AutoFit.
-
Older Excel versions:
Excel has introduced AutoFit feature with Excel 2016. So, if you’re using an older version, that might be the reason that you cannot see this function.
5. Alternatives to AutoFit in Excel
While AutoFit is a convenient feature, there are alternatives that can also help manage the presentation of data in Excel.
Here are some examples:
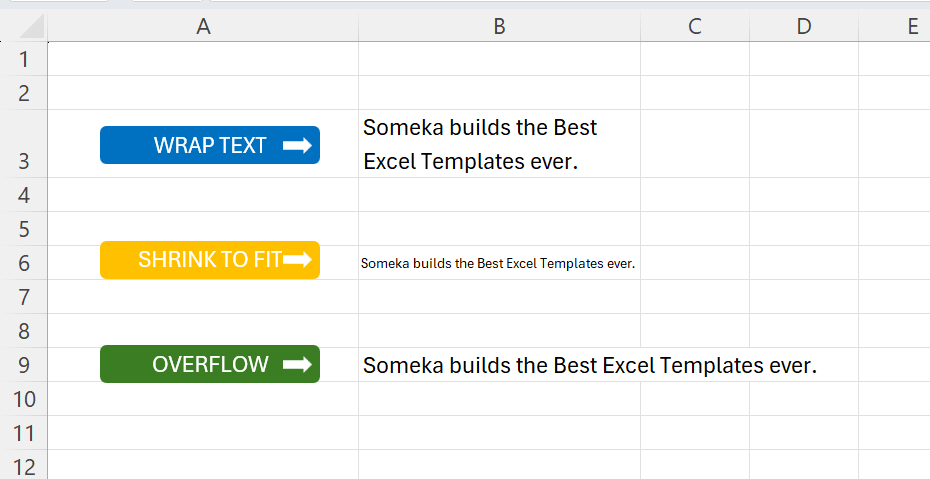
Wrap Text: This is useful when you have long text entries that you want to fit within a specific column width. Instead of adjusting the column width, Wrap Text will display the text on multiple lines within the same cell.
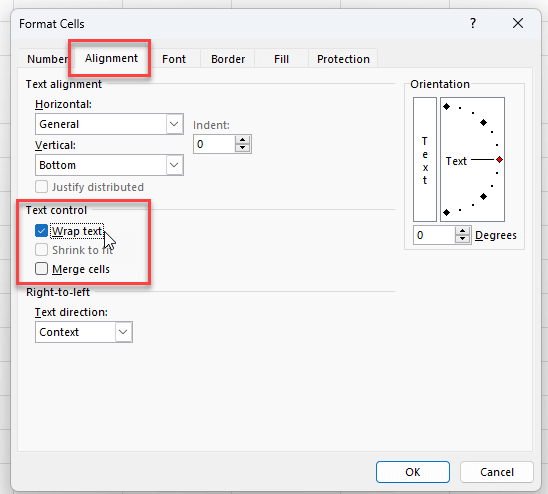
You can wrap text on the Format Cell window.
Merge: Although we never recommend merging cells in Excel workbooks, you can can be useful for creating headers or for formatting purposes. However, it can cause issues with data sorting and filtering.
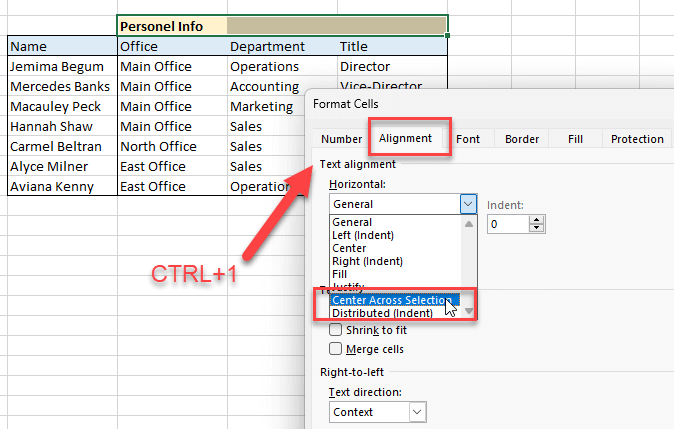
Center Across Selection: This is the best alternative to merging. You can center text across multiple columns without merging cells. You select the whole cells you want to center your text, and then this formatting puts your text just in the middle of the selected cells. So it looks like merge, but does not prevent your data analysis.
There are many types of formatting texts in Excel. Thus, you should know the pros and cons to select the best fit for your needs.
That’s all for the Autofit feature.
6. Key Takeaways
Finally, we have explained autofit feature in Excel with three different methods, instructions, possible troubles and solutions, alternatives, and much more. Our main aim is to give a pro perspective about content and text formatting in Excel. Let’s see our key takeaways in summary:
How do you AutoFit cell size to contents?
- Select the cell(s) you want to autofit
- Go to Home > Cells > Format
- Select Autofit Column Width or Row Height
If you are having problems or issues with autofitting, the below list might help:
What is the reason for not working Autofit?
Here are some possible reasons preventing AutoFit working:
- Merged Cells
- Hidden columns/rows
- Text alignment format
- Manual overrides
- Older Excel version
If you’re looking for alternatives, then the below box may help:
What are the alternatives to Autofit?
Here are some alternative formatting types to autofit:
- Wrap text
- Merge
- Center Across Selection
Finally, you can autofit your cells with double-click, ribbon buttons, VBA code or keyboard shortcuts. So, this how you can autofit in excel. Hope you enjoy our article!
Recommended Readings:
How to Combine Two columns in Excel Without Losing Data?
Format Input Tables in Excel – The Most Comprehensive Guide on Web
Related Posts