How to Make a Checklist in Excel? Easy Steps with Examples
In this article, we’ll explain you how to make a checklist in Excel. So, go through these easy steps to prepare your Excel checklists. Images and examples are also included.
Table Of Content
1. What is a checklist in Excel?
2. How to Create a Checklist in Excel?
3. Bonus: Using Checkbox Values for Formula and Conditional Formatting
4. Where to use Excel Checklists?
5. Alternatives to Checkboxes: Dropdown Menus
6. Key Takeaways
1. What is a checklist in Excel?
A checklist in Excel is a tool for tracking tasks or items. We use checklists often in project management, event planning, and daily to-dos.

Because of Excel’s flexibility, users can tailor their checklist to meet particular requirements. An Excel checklist can be a very useful organizational tool, regardless of its complexity—it can be as simple as a list of items or as intricate as a project tracker.
2. How to Create a Checklist in Excel?
We create checklists with checkbox tool under Excel Developer Tab. Here is a step-by-step guide to prepare your checklists:
Step 1: Enable the Developer menu
You must first enable Excel’s Developer tab in order to proceed. By default, this tab is not displayed.
Firstly right click on any spot on your ribbon and select Customize Ribbon.
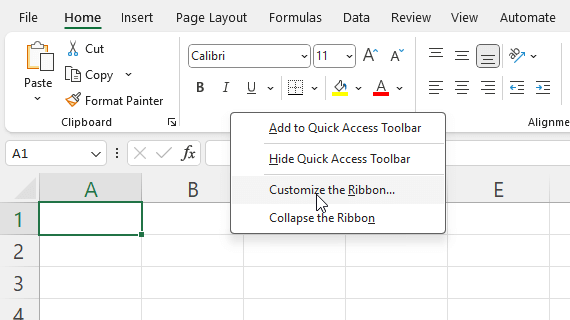
Alternatively, you can also go to File > Options > Customize Ribbon to open the ribbon customization window.
Then, check the Developer Box and click OK. Please be sure that you’re under Main Tabs to display the Developer option.
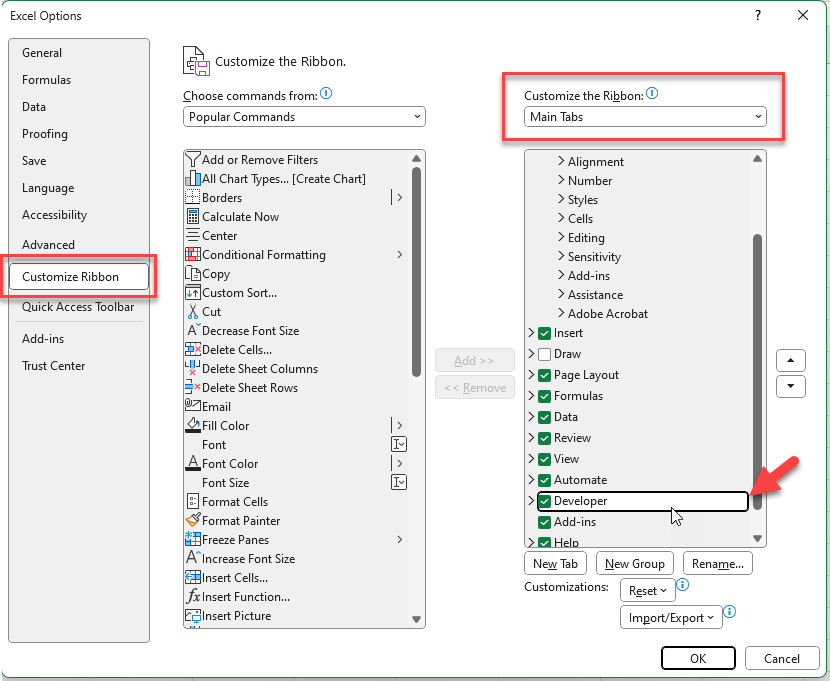
So, the ribbon will now display the Developer tab.
Step 2: Prepare your checklist items
Now, you will make a list of the things you want on your checklist next.
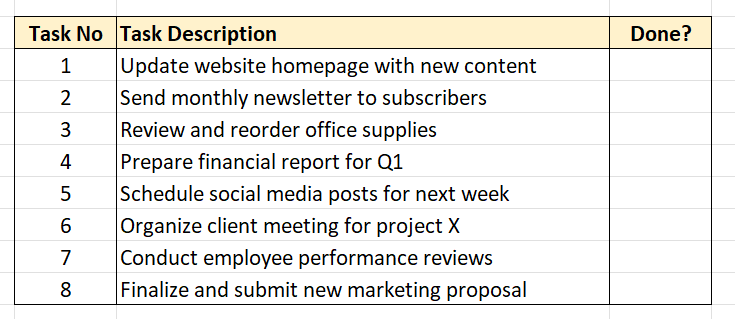
Enter each item in a column’s separate cell. This step lays the foundation for your checklist. So, please make sure your items are easy to track by making them clear and concise.
Step 3: Insert checkboxes next to the items
Now, we will use the Developer tab to insert checkboxes.
Go to Developer > Insert and choose the Checkbox under Format Controls.
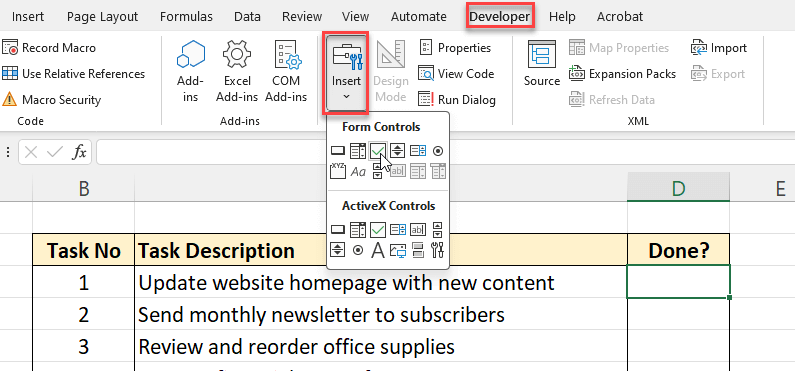
Lastly, you can click next to an item to place a checkbox.
Step 4: Format your checkboxes
Then, we will format your checkboxes for a cleaner look.
First, delete the checkbox name on your object.
Then, right-click a checkbox to open the formatting controls.
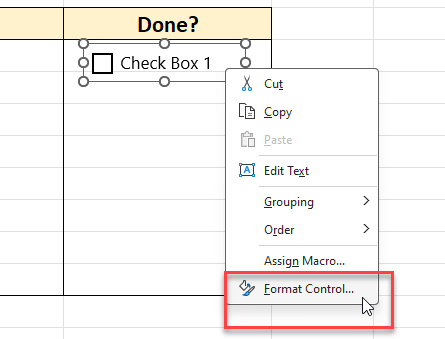
On the Format Control panel, you can make any styling changes on your checkbox:
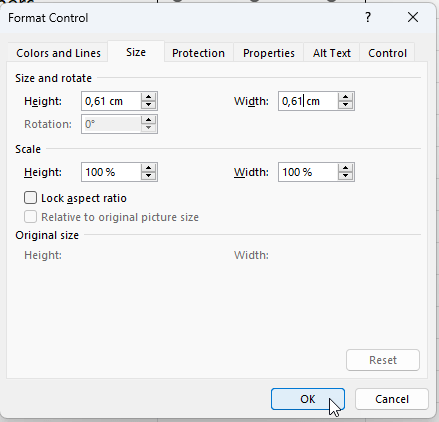
- You can change colors and size. We recommend you to use the same width and height to catch a square box. Also, you can add a colorful background if you like.
- You can configure protection settings.
- Under the Properties, you can select Move but don’t size with cells option so that your boxes also move with new columns with keeping the original size.
- You can add alt texts. This is an optional choice.
- Control tab is for you to select the linked cells, which we will explain in the next step.
Step 5: Link your checkbox to the cell
So, we’ll now link our checkbox to a cell, so that we can make calculations or other formatting with reference to your choice in this box.
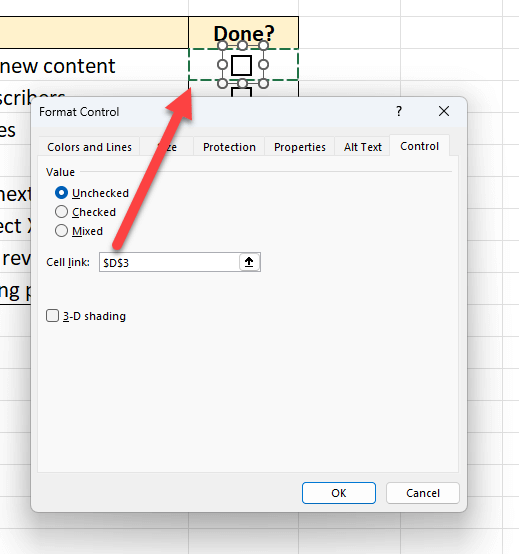
Here you’ll fulfill the Cell link box.
Step 6: Copy your checkboxes to the rest of your list
Now, we have prepared our first checkbox. In order to make a full checklist in Excel, we’ll copy the first one to the other items.
Go to the cell that your first checkbox is linked, and when you see the plus sign drag down until the end of your list.
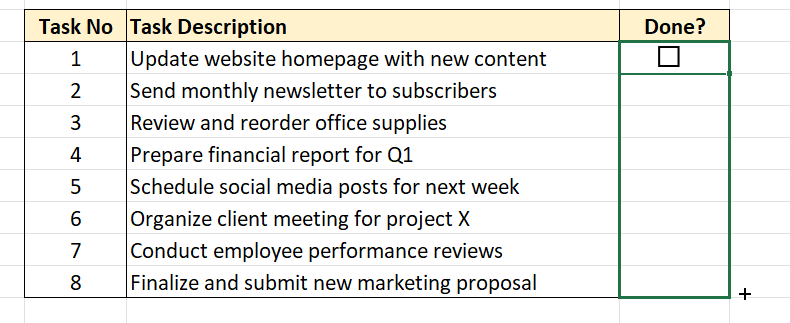
But there’s a downside here! You should go to each box to change the linked cells. Otherwise, all the boxes will be linked to the first cell.
Step 7: Remove True/False Values
Finally, you’ll see True/False values when you click on your boxes:

This is not what we want to see. But how to make values in a checkbox invisible?
We’ll make a workaround to make these values invisible. So, we’ll change the color of fonts to the same color as the background. If you do not have any background color, then make your fonts White:

That’s all. Now you’ve got a decent checklist in Excel!
3. Bonus: Using Checkbox Values for Formula and Conditional Formatting
In addition to using checkboxes as tracking tools, you can also take the values as reference to make calculations or other formatting on your checklists.
Let’s see some examples.
Adding conditional formatting to your checklist
Conditional formatting enhances your checklist by visually highlighting tasks.
So, you can set a cell to change color or use other formatting features once its corresponding checkbox is checked.
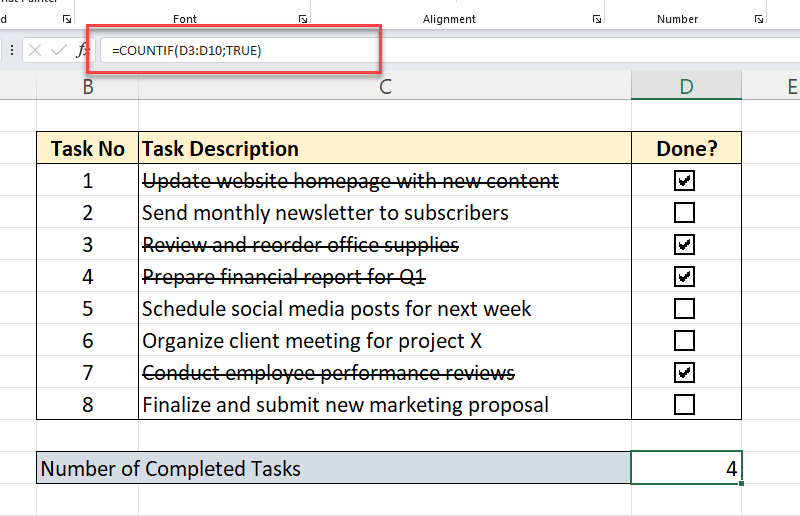
For example, let’s strikethrough the tasks that are done with conditional formatting.
- First select the task list, then go to Home > Conditional Formatting > New Rule.
- On the Format button, select your desired formatting for the checked items.
- Under the Rule Description, define your criteria formula. In our case, we’ll use the below formula which says if the adjacent cell is TRUE, which means if the box is checked, apply the conditional formatting.
- Click OK.

Thus, this feature helps in quickly identifying completed tasks.
Adding formulas with reference to checkbox values
Checkboxes can also interact with Excel formulas.
For instance, you can calculate the number of completed tasks. We’ll use the COUNTIF formula to count the TRUE value cells.
This integration offers a dynamic way to monitor progress. Also, you can add doughnut charts or other graphs to visualize your checklist progress.
You can watch a 60-second tutorial first:
4. Where to use Excel Checklists?
Excel checkboxes are flexible and useful in a range of situations. For task management, such as to-do lists or project milestones, they are perfect. So you can use check boxes on:
- Eisenhower Matrix
- Daily To Do Lists
- Action Priority Matrix
- Other task management tools
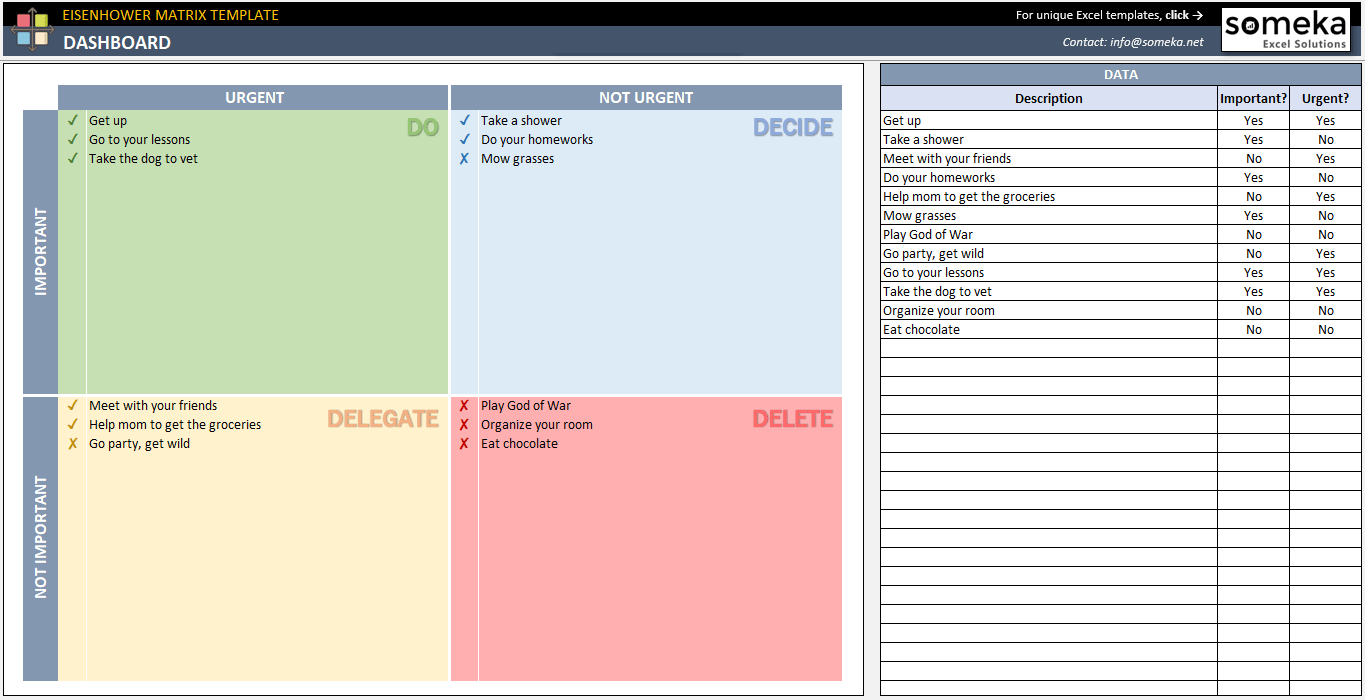
– This is the Dashboard of Eisenhower Matrix Excel Template in Someka portfolio –
Checkboxes are used in inventory management to monitor item availability. Or, inventory physical count sheets are also another important application area for Excel checklists
Also, you can use checkboxes for your control lists:

– This image is from Quality Control Checklist Template by Someka –
Another example can be the organizing your to do list for a specific period like vacation checklist, maternity leave checklist, SEO checklist, and so on.
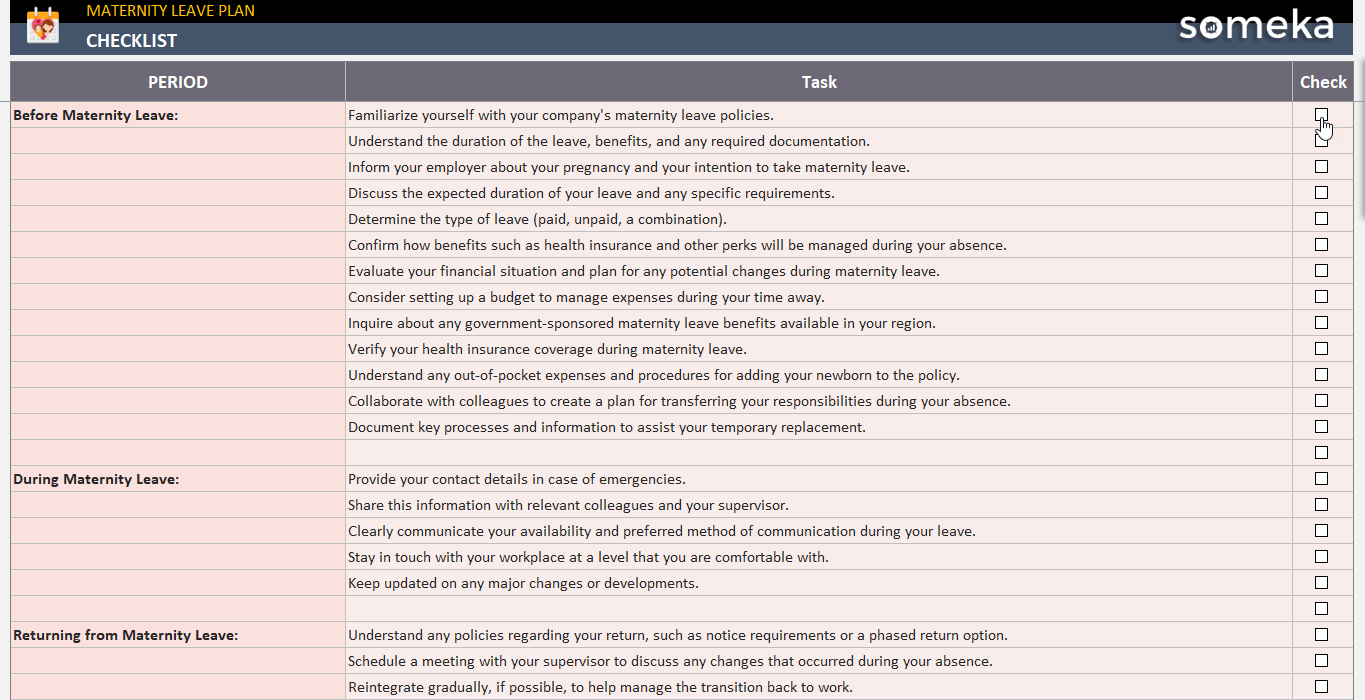
– This is the checklist section of Maternity Leave Plan Template by Someka –
Also, Excel checklists efficiently record responses in forms or surveys. While they work well for personal use when organizing events and creating goals, they can also help you with your profession as you want to keep track of your tasks. For example, you can use checklists for Executive Assistant Planners or Time-off Request Forms.
In summary, Excel checklist have a wide range of usage areas from personal needs to workplaces.

5. Alternative to Checkboxes to make a Checklist in Excel: Dropdown Menus
Definitely, your Excel sheets become more interactive with checkboxes, which improves their usability and usefulness. But if you do not want to bother yourself with enabling macros, adding and then linking checkboxes, you have a very useful alternative: Dropdown menus.
To add drop-down menus, after selecting your range go to Data > Data Validation, and choose List option and list your options:
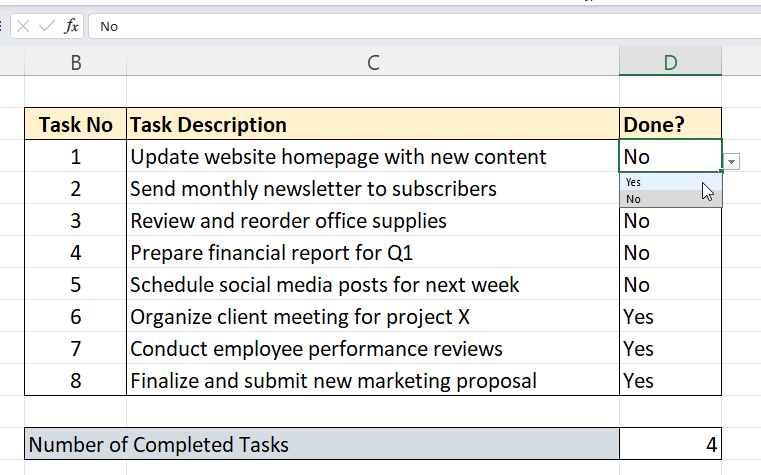
You can easily add drop-down menus as Yes/No, Started/Not Started, Incomplete/Done, and so on.
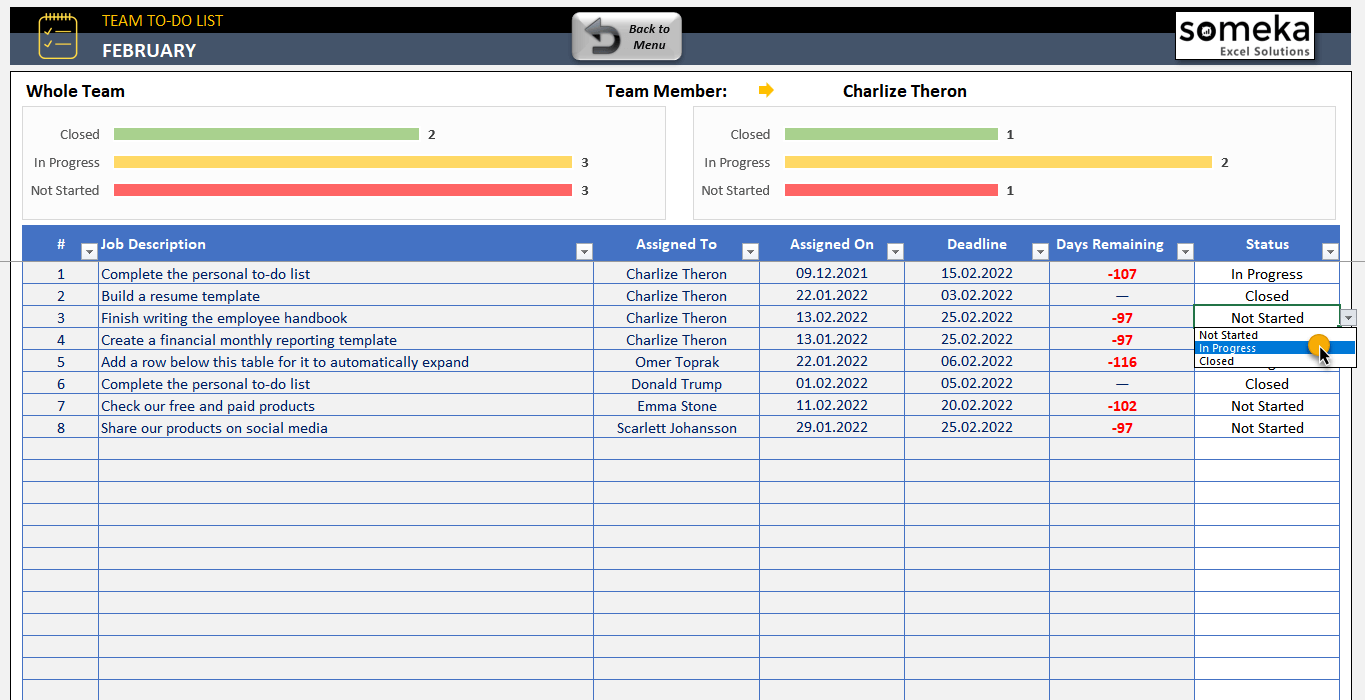
– This is an example from Team To Do List Template to monitor Status of each task.
The best part of using dropdowns instead of checkboxes is the ability to use more than two options. In the above example, we are using Not Started, In Progress and Closed options for tasks.
Also, you can even use progress percentages to make more sensitive selections and then link them with data bars with conditional formatting as shown below:
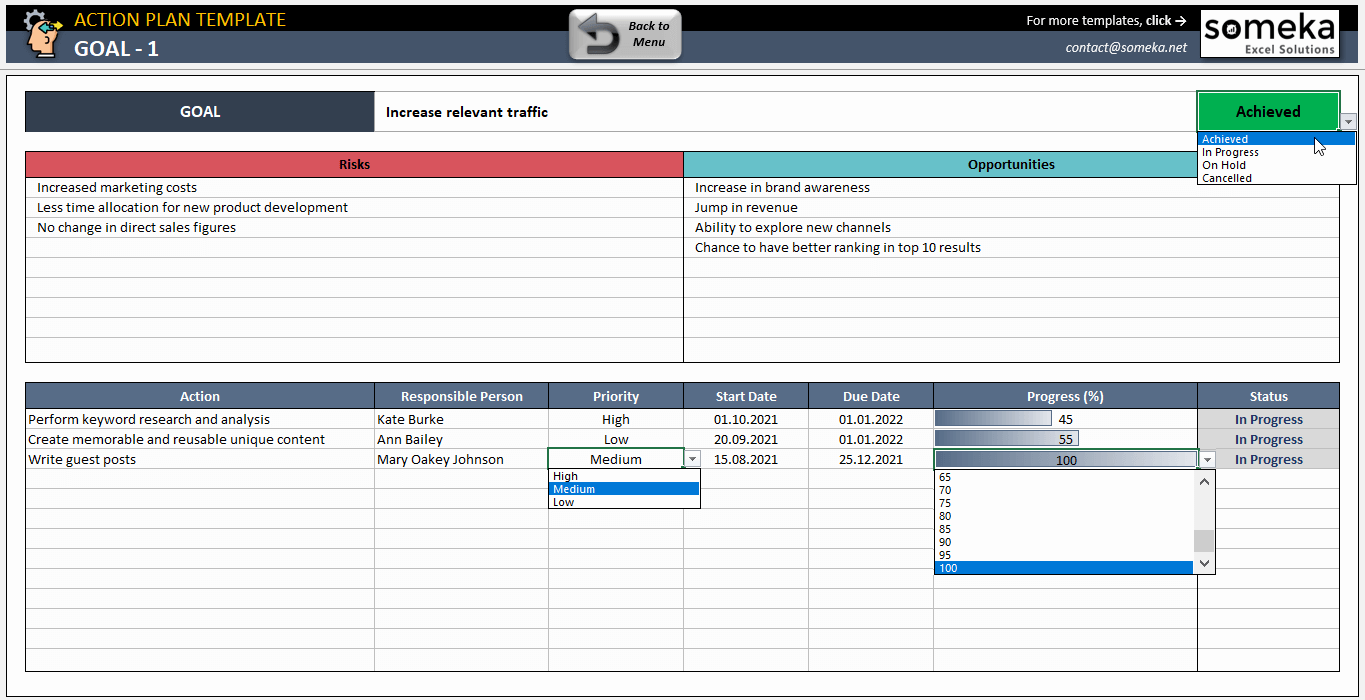
– This sheet is from Action Plan Template by Someka –
Therefore, if your are looking for an easy way or multi-optional checklists, then you can easily use drop-down menus as alternative to checkboxes to create Excel checklists.
6. Key Takeaways on how to make a checklist in Excel
Excel’s checkboxes will definitely improve data organization and interaction. Thus, these tools are very helpful whether you’re organizing tasks, monitoring inventory, or gathering feedback from surveys.
However, we want to add some key takeaways for you to create sleek-design checklists:
- You can make conditional formatting such as Strikethrough or a background color to highlight completed tasks.
- If you want to fix the position of a checkbox, use Don’t move or size with cells option.
- If you want the checkbox to be printed, make sure the Print object box is selected on the Format Control panel.
- If you want to give background to your lists, try to use light colors. And also keep away from using stripes, as this may create burdens if you want to insert new rows to your list.
- You can make checkbox values invisible with using the same color for both Fonts and Background.
- Finally, you can use dropdown lists instead of time-consuming checkboxes.
Excel checklists give your data clarity and structure, which improves the functionality and appeal of your Excel spreadsheets.
Recommended Readings:
How to Apply Conditional Formatting for Pivot Table in Excel?
Excel Dashboard Design: How to make impressive Excel dashboards like Someka does?
Related Posts