How to lock cells in Google Sheets?
One of the most known features of Google Sheets is to allow multiple users to access a file at the same time and edit it as desired. Sometimes you want your whole team to have access to a file, but you don’t want to allow anyone to edit it. At this point, this blog will show you step-by-step how to lock cells or sheets in Google Sheets.
How to Protect the Sheets in Google Sheets
Just like you can lock cells in Google Sheets, you can also lock any sheet of your Google Sheets file you are working on. Let’s get started to learn how!
1. Please right-click on the sheet you want to lock in the sheet tab.
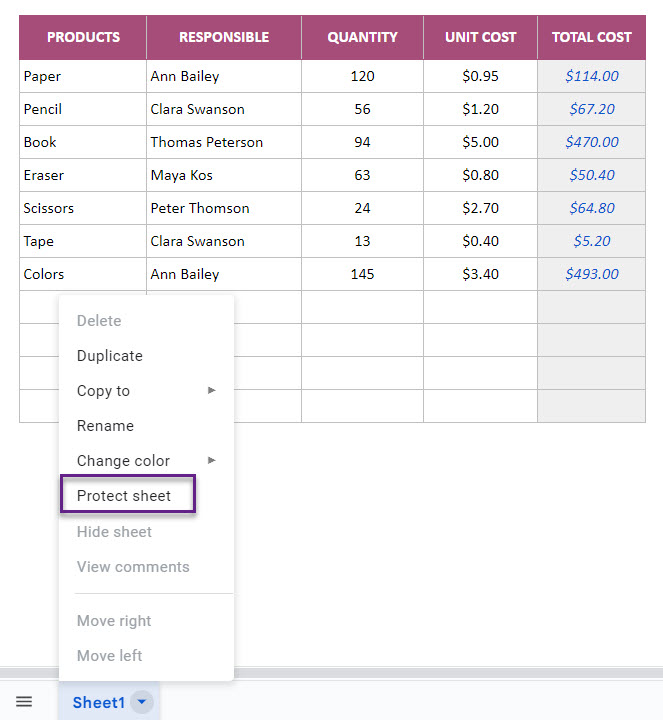
2. Make sure you select the Range option on the right side, then click on the “Set permissions” button.
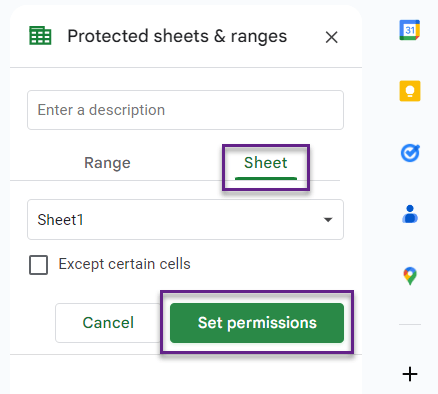
3. You will be presented with two options.
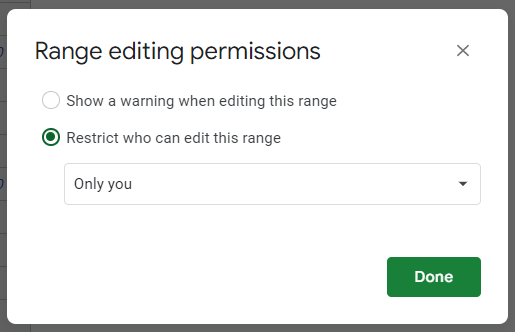
- “Show a warning when editing this range”: This option will not prevent users from editing, but if users want to make a change they will see a popup with a confirmation message.
- “Restrict who can edit this range”: The owner can specify who can edit this file. In this second option, users other than those who are allowed access will only be able to use the file in view mode. So, if you want to lock cells in Google Sheets or protect sheets, this option seems more appropriate for you.
4. Now, you protected the sheet successfully.
How to lock a cell or a specific range in Google Sheets
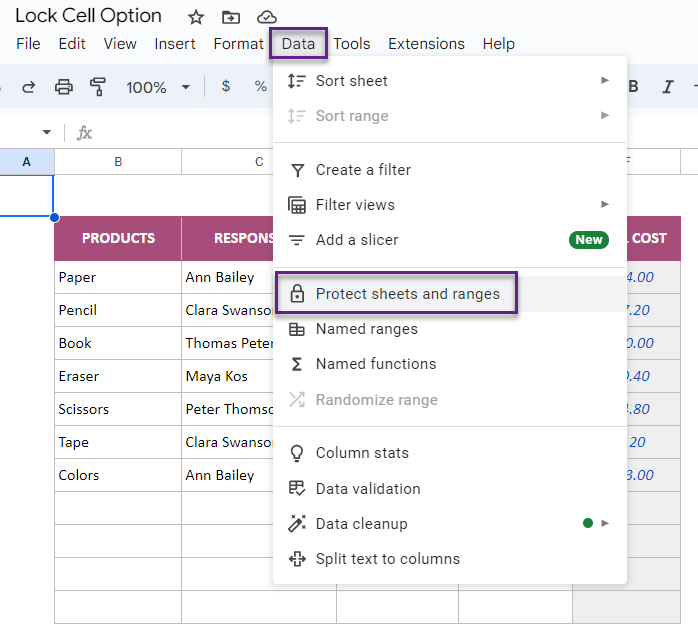
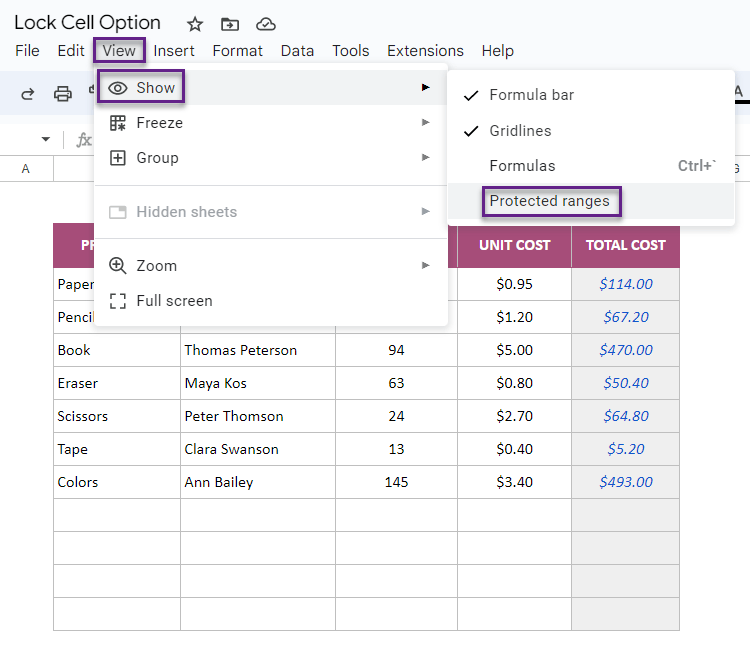
1. If you specifically want to lock a cell in Google Sheets, first, click Data from the toolbar. Then click on “Protect sheets and ranges”.
2. Click on “+ Add a sheet or range”.
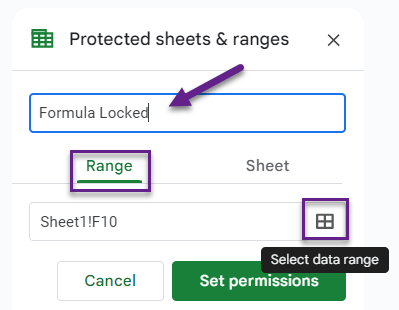
3. Make sure you selected the Range. If you want, you can name the protection before lock cells in Google Sheets. Then click on the “select data range” icon to select a specific cell or range.
4. Select the range you want to lock and click OK.

5. You will be presented with two options again same as protect the sheets.
- “Show a warning when editing this range”, this option will not prevent users from editing, but if users want to make a change they will see a popup with a confirmation message.
- “Restrict who can edit this range”, the owner can specify who can edit this file. In this second option, users other than those who are allowed access will only be able to use the file in view mode.
6. Now, you protected the range.
How can we unprotect the cells or sheets in Google Sheets?
1. Please select Data from the tools and then click “Protect sheets and ranges”.
2. In the right panel that opens, you will view the protected cells and sheets. Please click on the protection you want to remove.
3. Click on the Delete option.
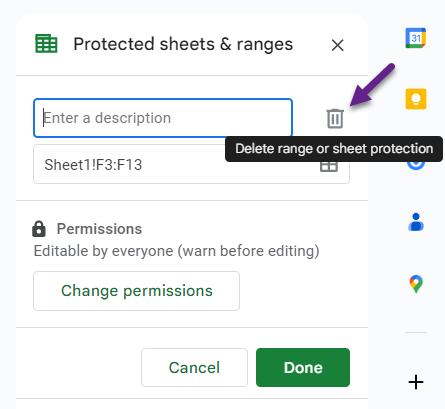
4. Now, you unprotected the sheet.
In conclusion, if you don’t want any viewer to edit your file or any part of your file in Google Sheets, you can easily lock the cells and sheets. Therefore, making sure that you have the control over your file while you can also share your online Google spreadsheet.
Related Posts