How to Unhide All Rows in Excel? Simple Guide
People hide rows in their Excel sheets to narrow their analysis, to prevent third parties some specific rows, to remove unnecessary info, etc. But how to unhide them back? Here’s a simple guide for you show how to unhide all rows in Excel with examples, images and tips.
Table Of Content
1. Rows and Columns in Excel
2. How to Unhide All Rows in Excel?
3. What’s shortcut key to unhide all rows in Excel?
4. How to unhide specific rows?
5. Why can I not unhide my rows within my Excel sheet?
6. Why to unhide rows in Excel?
7. Conclusion
Let’s begin!
1. Rows and Columns in Excel
Let’s start with a very short intro to rows and columns in Excel worksheets.
Basically, Excel has rows and columns that work together to make a grid of cells. On the left side of the sheet is a number that corresponds to each row.
In a standard sheet, the columns, on the other hand, are labeled alphabetically across the top, from “A” to “XFD”. Together, these over 16,000 columns make up the sheet.

Rows and columns are the basic building blocks that are used to arrange and change data. You can change their sizes, formats, and, of course, whether they are hidden or not based on your needs.
2. How to Unhide All Rows in Excel?
It’s so easy to unhide rows in an Excel worksheet. You should only be careful about some details.
Let’s see the basic steps:
Step 1: Select All Visible cells
First, we will select all the cells in your worksheet.
If you press CTRL + A on your keyboard, you can do this quickly.
Another option is to click on the small triangle in the upper left corner of your worksheet, where the row numbers and column letters meet.
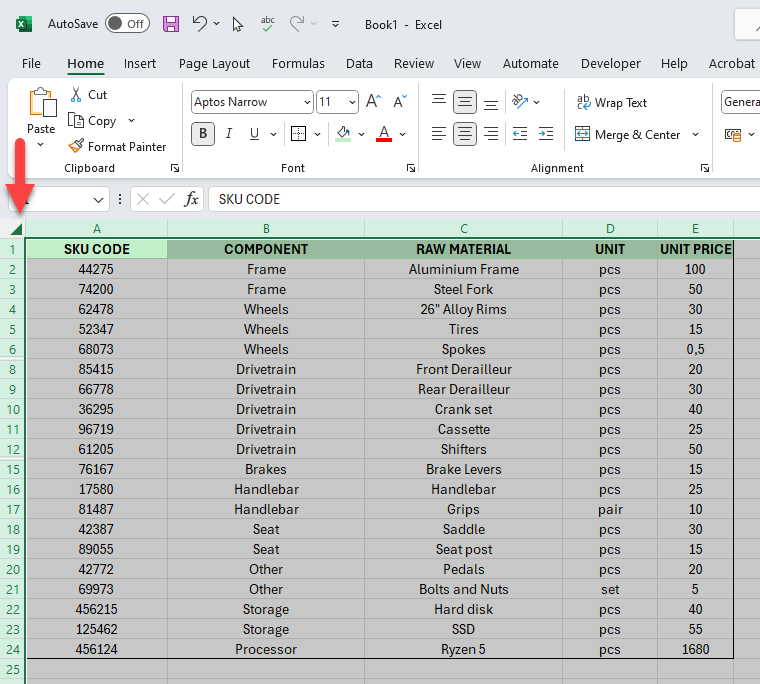
So, this action picks out every cell in your worksheet, even the ones that are hidden.
Step 2: Unhide Cells from the Ribbon
Under the Home tab, go to Cells > Format > Hide and Unhide > Unhide Rows.
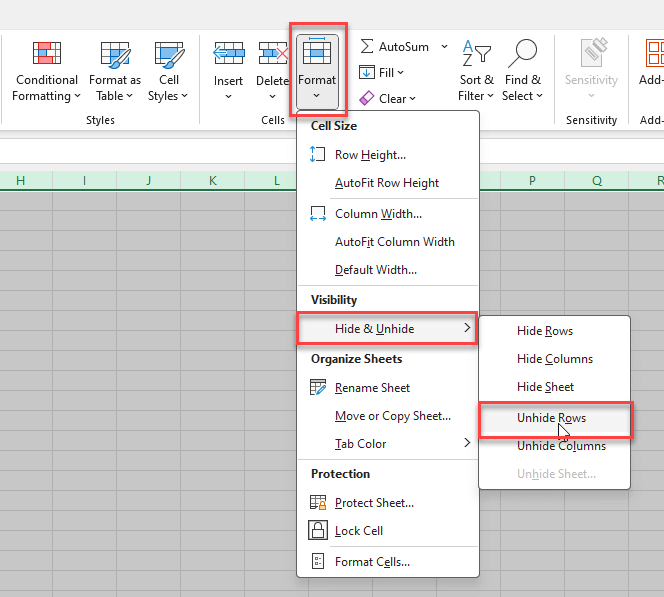
So, at the Cell Formatting module of Home tab, you’ll find Unhide Rows button under the visibility section. The above image shows the exact path.
Also, you can use the right-click option. Once you right-click on the rows headings you’ll see unhide rows option under the menu.
Step 3: Save your work
Lastly, don’t forget to save your work with CTRL + S to keep your rows unhidden.
Basically, that’s all on how to unhide all rows in Excel. So, not let’s go more deeper.
3. What’s shortcut key to unhide all rows in Excel?
While working on any data analysis in Excel, keyboard shortcut keys are so important for a more efficient work.
So, after selecting all you visible data with CTRL + A, you can use CTRL+Shift+9 shortcut key to unhide all rows.
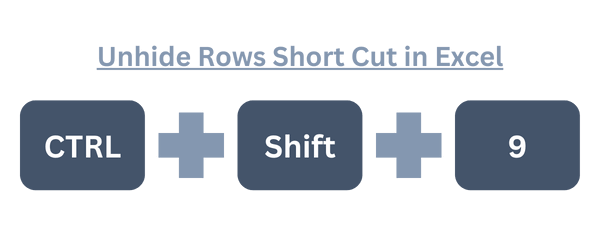
This will display all the rows in your dataset.
By the way, CTRL+9 shortcut key will hide the selected rows. This is an additional info!
4. How to unhide specific rows?
Sometimes, you may need to unhide specific rows rather than all rows in an Excel spreadsheet.
Here’s how to unhide specific rows in Excel:
1. Identify the Hidden Rows
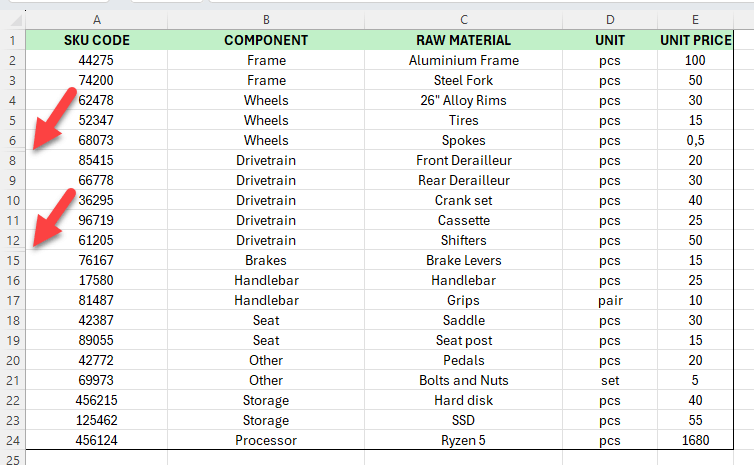
First, you need to select the area where the rows are hidden. You can often tell where rows are hidden because the row numbers will skip (for example, if you see row numbers jumping from 5 to 10, rows 6 through 9 are hidden).
2. Select Hidden Rows:
Click on the row number above the hidden rows and drag to the row number below them. For instance, if rows 6 through 8 are hidden, you can click on row 5, hold, and drag down to row 9.

3. Right-click
Once you right-click on the selected rows, you’ll see the menu. Click on the Unhide to display selected rows.
This will reveal the hidden rows within the selected range.

5. Why can I not unhide my rows within my Excel sheet?
Sometimes, you might not be able to unhide rows in Excel. This can be annoying, especially if you need to see data that is hidden.
Here are some possible troubleshooting ides:
a. Rows are Minimized Rather than hidden
Check the heights of your rows. Maybe they are too small, but not hidden.
b. Frozen Panes
Also, the freeze panes can block your view and make it look like rows are hidden.
So, you can check your freeze pane selection on View > Freeze Panes on the ribbon.
c. Filtering
If you use filtering on your data, some rows may be hidden because they meet the criteria for the filter.
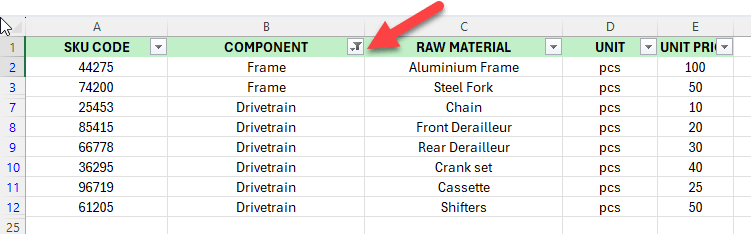
You can clear all the filters under Data > Filter and then unhide your rows.
d. Worksheet protection
If the worksheet is protected, you might not be able to do some things, like unhiding rows.
To unlock the worksheet, go to Review > Unprotect Sheet and enter the correct password, if one was set.

e. Possible Corruption
In rare cases, corruption within the Excel file can lead to unusual behavior like inability to unhide rows. Trying basic file recovery or opening the file on another device or Excel version can sometimes resolve this issue.
These are among the most common troubles preventing unhide feature in Excel. If you’re still having problem, feel free to reach us.

6. Why to unhide rows in Excel?
Lastly, let’s talk about why we need to unhide rows. Some of the most important reasons you might need to show hidden rows in Excel:
- Complete Data Review: Important data that changes calculations and results can be hidden in rows that aren’t visible. So, by showing these rows again, you can see all of the data at once, which is important for accurate analysis and decision-making.
- Data Cleaning and Preparation: Also, rows are often temporarily hidden during data preparation steps to make the view easier and help you focus on the right parts. To look over changes, make sure they are consistent, and get data sets ready for more processing or analysis, you need to unhide rows.
- Collaboration and Sharing: Make sure that all relevant data can be seen when you share worksheets with coworkers or other important people. Unhiding rows makes sure that everyone has access to the same information and avoids misunderstandings, which is very important for collaborative work environments.
- Troubleshooting and checking for errors: Hidden rows can sometimes cause formulas to give wrong results or make mistakes. By showing these rows, you can help fix problems, look for mistakes, or just make sure that all the data is taken into account in calculations.
There could be many more reasons, of course. But the general reason is to make all data visible to everyone.
7. Conclusion
We have tried to explain how to unhide all rows in Excel with images and examples. So you can easily unhide the rows in your worksheet.
Additionally, if you’re having trouble with enabling the unhide feature, then you can check out the possible troubles above. So, you’ll probably find your solution there.
Hope you enjoy our article. Stay tuned for more Excel tips!
Recommended Readings:
How to add bullet points in Excel? 5 Easy Ways with Examples
Related Posts