How to make a Floor Plan in Excel? Simple Steps to Create Sketches
In this article we’ll discover how to make a floor plan in Excel. After initial explanations on floor plan sketch-ups, you’ll find a ready Excel template to create your floor plans and then we’ll also provide you with a step-by-step guide to create floor drafts in Excel from scratch.
Table Of Content
1. What’s a Floor Plan?
2. Can you use Excel for floor plan?
3. How to make floor plans with Someka’s Automated Floor Plan Creator?
4. How to create a floor plan in Excel from scratch?
5. Conclusion
Using Excel to create a floor plan might seem unusual. For those who are acquainted with spreadsheets, however, it’s a useful and approachable method. Excel is surprisingly useful for this task because of its drawing tools and grid system.
1. What’s a Floor Plan?
A floor plan is a scaled diagram of a room or building. Typically, it displays the arrangement of the furniture, windows, doors, and walls.

In interior design and architecture, floor plans are crucial. They support planning furniture arrangements, space visualization, and other tasks.
2. Can you use Excel for floor plan?
Yes, sure! You can use Excel to create floor plans.
In addition to data management, Excel has drawing tools. Simple floor plans can be made with shapes and borders.
Excel is widely available, but it’s not as sophisticated as specialized software. It works well for simple layout sketching and planning.

3. How to make floor plans with Someka’s Automated Floor Plan Creator?
If you want a ready solution for your Excel floor plan drafts, then we have a very unique tool in our portfolio:

– This is Someka Floor Plan Creator for easy drawings –
With this template, you’ll not need to manually create your drawings, you can just create your plan with button clicks.
How to make floor plans with this ready-to-use tool?
#Step1: Easy settings before you start your project
Firstly, you can make some configurations on your template for your specific needs. Here are the easy steps for your first set-ups:
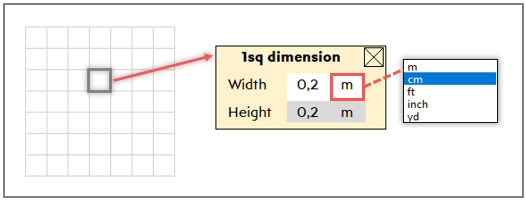
- Determine the coordinates of your starting point
- Adjust the dimensions per square
#Step2: Input your elements to the table
You’ll just add all the elements that you want to have in your floor plan. You’ll also add the dimension and starting point info that the template creates your plan automatically.

#Step3: Click on Draw button
Yes, that’s all. You’ll list your elements and your floor plan will be created with a single button click. On our product page you may also find more detailed information on how to use this tool.
4. How to create a floor plan in Excel from scratch?
If you want to create your floor plans from start, let’s start together with step-by-step guide:
Step 1: Prepare your grids
First, you should arrange the Excel grid so that it looks like graph paper. To depict a scale, please change the cell size such that one cell is equivalent to one square foot.
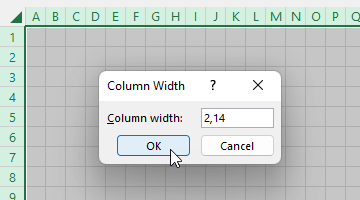
Drawing the plan to scale is made easier with the help of this setup.
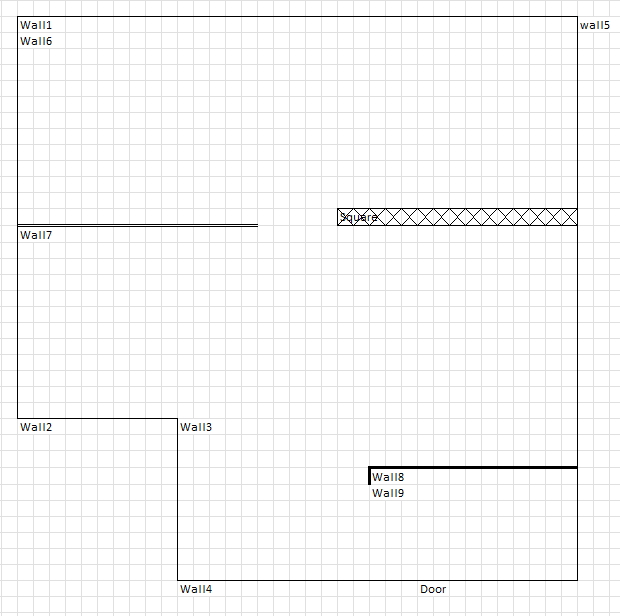
Step 2: Draw your walls with borders
Firstly, to draw walls, we will use Excel’s border tool. You can adjust border styles and colors from the Format Cell dialog box, which has a shortcut key of CTRL+1.
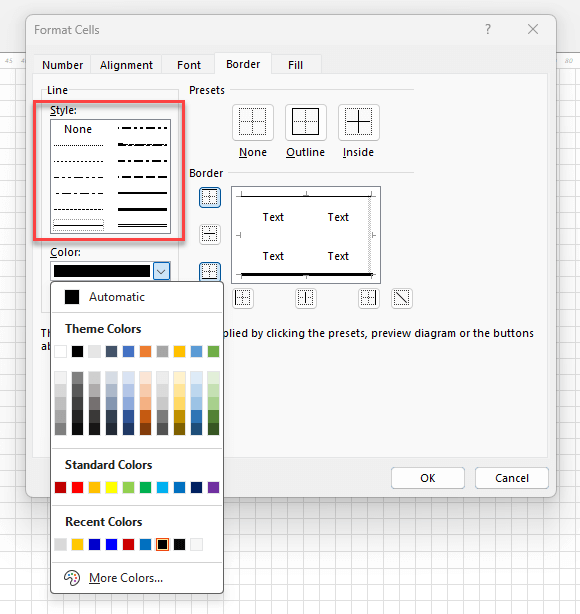
So, you can draw thick borders around each room’s perimeter. This stands in for the walls. Then, you can use a different border style or color for interior walls to create contrast.
Step 3: Add window and doors
Now we’ll add doors and windows to our main sketch.
Here, we can make indentations in the borders or use different colors to accommodate windows and doors.
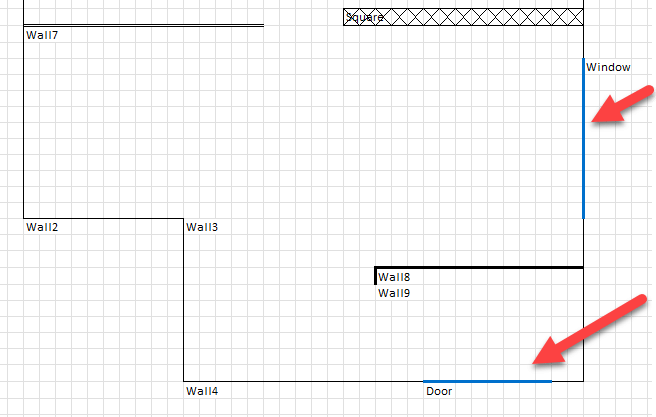
To distinguish between them, you may use distinct line styles. For example, using double lines for doors and dashed lines for windows might be an option. This facilitates seeing the wall apertures.
Step 4: Customize your floor plan
Firstly, customization entails adding information such as room names, measurements, and other particulars. That’s way, you can use Excel’s text and shape tools. The clarity and usefulness of the floor plan are improved by these details.
Here are some suggestions:
- Change border colors
- Write some comments and notes
- Color your backgrounds
Step 5: Add Furniture
Lastly, you may add furniture icons to your draft. But, this is an optional step. You can use your own pictures from your device, or add Excel’s stock images.
So, in Excel top menu, go to Insert > Pictures > Stock Images to add furniture icons.
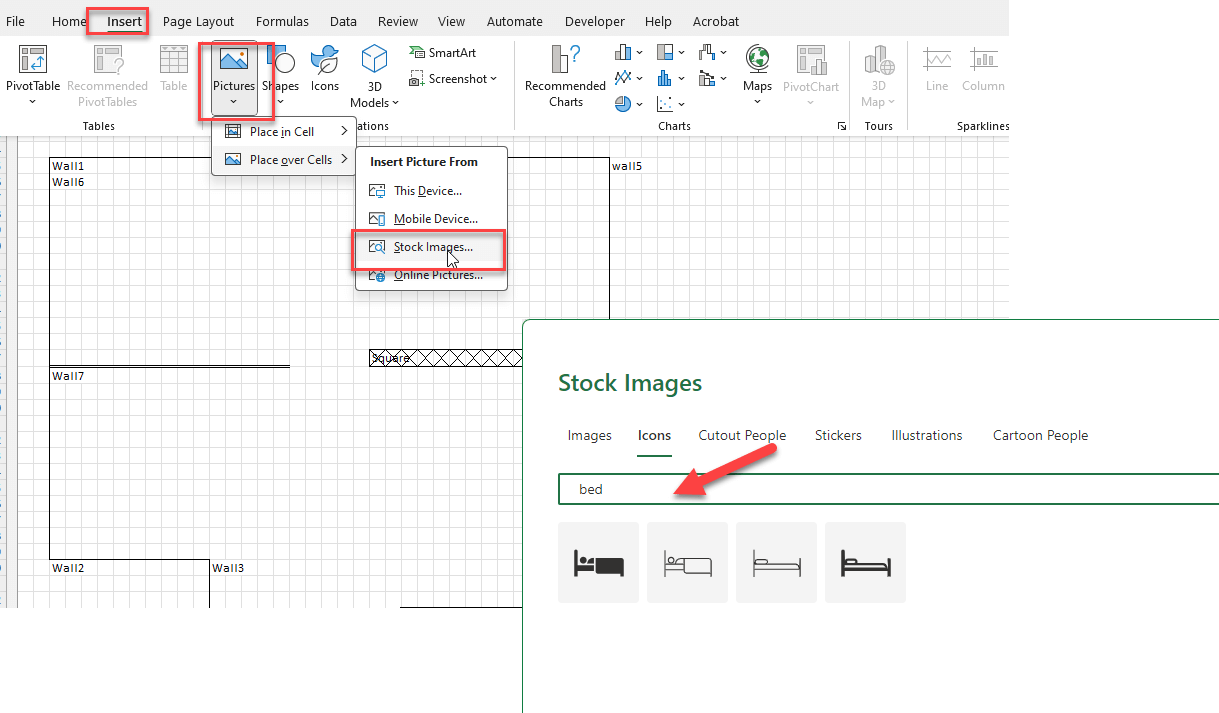
Also, you may search for pictures of furniture online and add them to your design.
Now, all you have to do is adjust these images’ size and placement to match your design. This stage helps with space planning and gives your floor plan life.
Step 6: Print your floor plan sketch up
Thus, it’s time to print your floor plan once it’s finished. Please make sure the scale of your printer is the same as your floor plan. Because, this guarantees that the layout will print accurately.

5. Conclusion
Microsoft Excel is such a flexible tool that you can use this spreadsheet to make floor plans
As explained with step-by-step guide, you can use borders, shapes, or pictures to draw your floor plans from scratch. Or, as a more professional and easy way, you can use Someka Floor Plan Creator to make your flexible and quick drafts.
Then, you can use these plans for your presentations to architects, contractors, clients or creditors.
Recommended Readings:
How to Make a Schedule in Excel? Step-by-Step Guidance
Floor Plan Templates Collection: Free Sketches in Excel and PDF
Related Posts